Make the Biscoff cookie crust: In a food processor, pulse Biscoff cookies until they become fine crumbs. Transfer 2 cups of crumbs to a mixing bowl and stir in 2 tablespoons granulated sugar. Pour in the melted butter and mix with a fork until all crumbs are evenly moistened and the mixture holds together when pressed. Using a small cookie scoop (about 1 tablespoon), portion the crumb mixture into mini cheesecake pans. Firmly press the crumbs into the bottom of each cup using the back of a spoon or small glass to form a compact crust. Set aside.
Prepare the Biscoff cheesecake filling: In a large mixing bowl, combine room temperature cream cheese, 1¾ cups powdered sugar, 1 cup Biscoff spread, and 2 teaspoons vanilla extract. Using an electric hand mixer, beat on medium speed for 2-3 minutes until completely smooth and creamy with no lumps. Scrape down the sides of the bowl as needed to ensure everything is well incorporated.
Add the cream and whip: Pour 1 cup of cold heavy cream into the cream cheese mixture. Continue beating on medium-high speed for 2-3 minutes until the mixture thickens and becomes light and fluffy, similar to mousse. You're looking for soft peaks that hold their shape. Don't overbeat or the mixture may become grainy.
Fill the mini cheesecakes: Transfer the cheesecake filling to a piping bag or large zip-top bag with one corner snipped off. Pipe the filling onto each prepared crust, filling slightly above the rim of each cup as the filling will settle during chilling. If you don't have a piping bag, carefully spoon the filling into each cup.
Chill the cheesecakes: Cover the pan lightly with plastic wrap, ensuring it doesn't touch the surface of the cheesecakes. Refrigerate for at least 12 hours or overnight. This extended chilling time is essential for the filling to set properly and for flavors to develop fully. After chilling, gently remove the cheesecakes from the pans by pressing up on the removable bottoms.
Make the whipped cream: In a clean mixing bowl with an electric mixer, whip ¾ cup heavy cream, 2 tablespoons powdered sugar, and ½ teaspoon vanilla extract on medium-high speed until medium-stiff peaks form, about 2-3 minutes. Transfer to a piping bag fitted with a Wilton 1M piping tip.
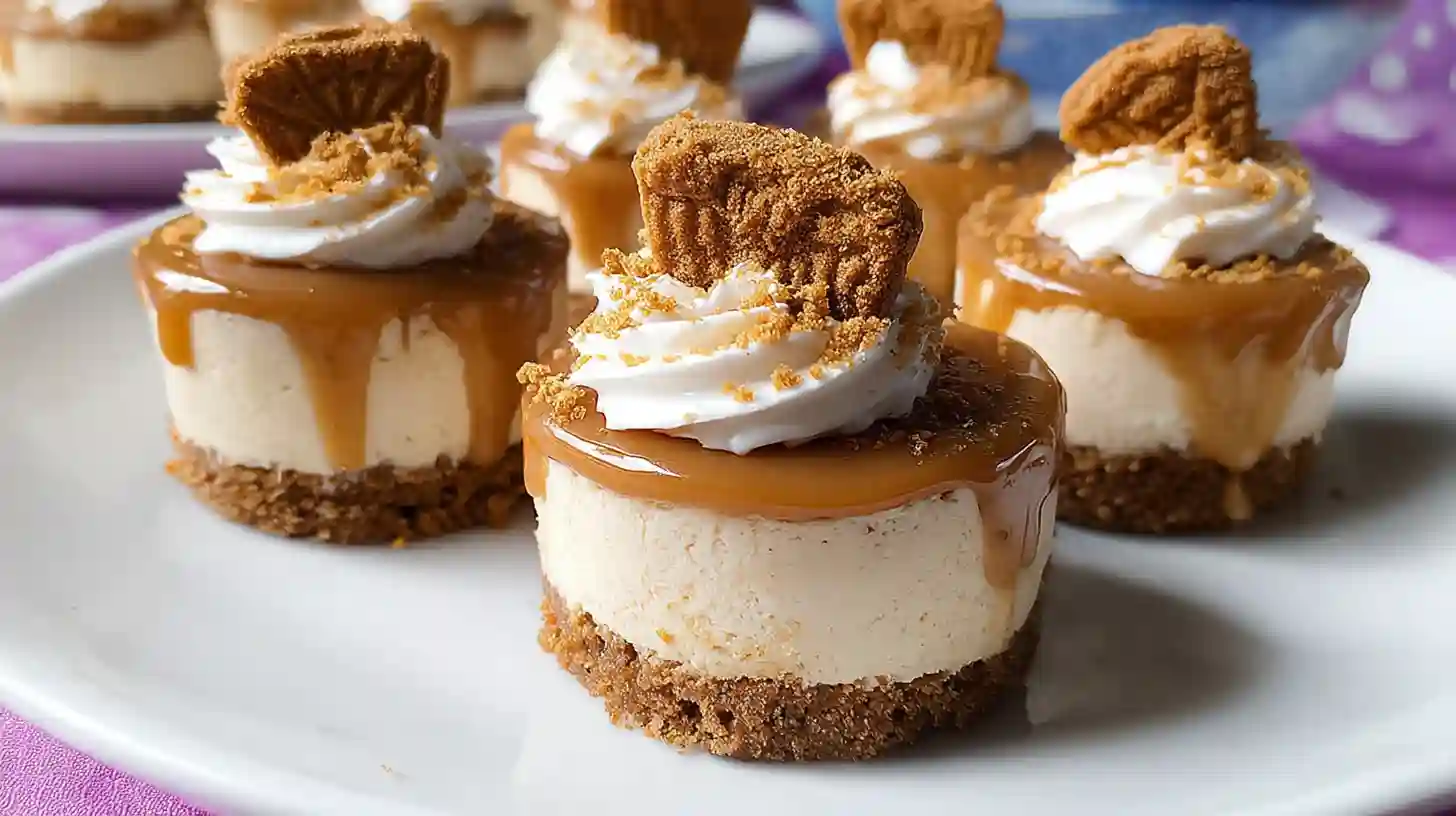
Assemble and decorate: Heat the additional ¾ cup Biscoff spread in the microwave for 20-30 seconds until slightly melted and pourable. Drizzle or spoon the melted Biscoff spread over the top of each chilled cheesecake. Pipe a swirl of whipped cream on top of each cheesecake using the 1M tip. Sprinkle with Biscoff cookie crumbs and top each with half of a Biscoff cookie pressed gently into the whipped cream. Serve immediately or refrigerate until ready to serve.