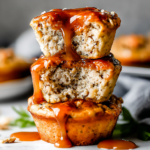
There are some recipes that just feel like a warm hug, and these Mini Grilled Cheese Hawaiian Rolls are exactly that. I remember the first time I made them for a casual get-together. I needed something fast, ridiculously easy, and guaranteed to disappear. This recipe was born out of that necessity, combining the sweet, fluffy texture of Hawaiian rolls with the unbeatable, gooey pull of melted cheddar and mozzarella. They are more than just a snack; they’re a centerpiece for conversation, a guaranteed crowd-pleaser, and one of the best easy shareable dishes I’ve ever made. The moment you pull these buttery, golden-brown sliders from the oven, the aroma alone promises pure comfort and joy.

What makes this recipe truly special is its simplicity and versatility. It’s the kind of dish you can whip up for almost any occasion. Looking for great housewarming foods? These are perfect. Need some simple snacks to cook for a movie night? Done. They’ve become my go-to when I need a reliable dish that feels both indulgent and effortless. The buttery tops get perfectly crisp, the cheese melts into a glorious, stringy river, and the soft rolls hold it all together. It’s a recipe that invites collaboration, making it one of those perfect foods to make with kids who can help spread the butter and sprinkle the cheese. Whether you’re packing them as food to bring to work or serving them as grill out appetizers, these mini grilled cheese sliders are a guaranteed hit that people will ask you to make again and again.
Ingredients for Mini Grilled Cheese Hawaiian Rolls
- 12-pack of Hawaiian sweet rolls
- 1 cup shredded sharp cheddar cheese
- 1 cup shredded low-moisture mozzarella cheese
- 1/2 cup salted butter, softened to room temperature
- 1 teaspoon garlic powder
- 1 teaspoon dried oregano or basil (optional)
How to Make Mini Grilled Cheese Hawaiian Rolls
- Preheat and Prepare: First things first, get your oven preheating to 350°F (175°C). This ensures your rolls will bake evenly and the cheese will melt perfectly. Grab a baking sheet and a large piece of aluminum foil; you’ll need it for wrapping.
- Slice the Rolls: Take the entire slab of Hawaiian rolls out of the package but don’t pull them apart. Using a long, serrated bread knife, carefully slice the rolls in half horizontally. You should have one large top piece and one large bottom piece. This method is the secret to getting an even layer of cheese in every single slider.
- Butter Them Up: Place both halves cut-side up. In a small bowl, mix your softened butter with the garlic powder and optional dried herbs until well combined. Generously spread this garlic herb butter over the cut sides of both the top and bottom sections of the rolls. Don’t be shy here; this butter is what creates that delicious, savory crust.
- Layer the Cheeses: Set the bottom half of the rolls on your large piece of aluminum foil. Now for the best part! Sprinkle the shredded cheddar and mozzarella cheese evenly over the buttered bottom layer. Using a blend of cheeses gives you both a sharp flavor from the cheddar and that incredible, stretchy “cheese pull” from the mozzarella.
- Assemble the Sliders: Carefully place the top half of the rolls back onto the cheese-covered bottom half, lining them up so it looks like the original slab of rolls.
- Wrap for Baking: Tightly wrap the entire block of sandwiches in the aluminum foil. This is a crucial step! The foil traps steam, which is what melts the cheese into that perfectly gooey consistency throughout the middle of the rolls.
- Bake to Perfection: Place the foil-wrapped rolls directly on the oven rack or on a baking sheet. Bake for 15-20 minutes. You’ll know they’re ready when the cheese is completely melted and bubbly.
- Get that Golden Top: For a truly irresistible finish, carefully unwrap the top of the foil, exposing the tops of the rolls. Return them to the oven for another 3-5 minutes. Watch them closely during this step—you’re looking for a beautiful, deep golden-brown color and a slightly crispy texture on top.
- Rest and Serve: Remove the sliders from the oven and let them cool for just a minute or two. This helps the cheese set slightly, making them easier to slice. Use your bread knife to cut along the original separations to create individual mini sandwiches. Serve them immediately while they’re warm and the cheese is at its peak meltiness.
Tips & Tricks for the Best Mini Grilled Cheese Hawaiian Rolls
Over the years, I’ve learned a few things that take these Mini Grilled Cheese Hawaiian Rolls from simply good to absolutely unforgettable. First, let’s talk about the butter. It is essential to use butter that is truly softened to room temperature, not melted. Melted butter will make the rolls soggy, while softened butter creates a rich, flavorful barrier that toasts the bread to perfection. If you forget to leave butter out, you can microwave it in 5-second intervals, but be very careful not to let it melt. This simple detail makes a huge difference in the final texture and ensures every bite is crisp on the outside and soft on the inside. It’s a trick that elevates them from a simple snack to something worthy of being called the best housewarming foods.
Next up is the cheese. While pre-shredded cheese is convenient, I highly recommend buying blocks of cheddar and mozzarella and shredding them yourself. Pre-shredded cheeses are often coated in anti-caking agents like potato starch, which can prevent them from melting as smoothly and creamily as freshly shredded cheese. Taking a few extra minutes to shred your own will reward you with a superior cheese pull and a much more luscious, gooey center. Also, feel free to pack the cheese on! You want a generous layer that covers the entire surface of the bottom rolls. When you think you’ve added enough, add just a little more. This ensures every single slider is packed with cheesy goodness, making them a top-tier choice for food to bring to a party.
How do you prevent the bottom of the rolls from getting soggy?
The key to avoiding soggy bottoms is twofold. First, the generous layer of softened butter on the cut side of the bottom rolls creates a fat barrier, preventing the moisture from the cheese from seeping into the bread. Second, don’t assemble them too far in advance. If you need to prep ahead, you can slice the rolls and mix the butter, but wait to assemble and add the cheese until you are ready to bake. Baking them on a preheated baking sheet can also help toast the bottom quickly, giving it a nice, stable base for all that melted cheese.
Substitutions & Variations
One of the best things about this Mini Grilled Cheese Hawaiian Rolls recipe is how easy it is to customize. It’s a fantastic base for all sorts of delicious combinations, so you can tailor it to your tastes or whatever you happen to have in the fridge. Think of this as your new favorite template for amazing sliders. If you want to add some protein, you can easily turn these into delicious ham and cheese sliders, which is a nod to classic Ham And Cheese Sandwich Recipes. Simply layer some thinly sliced deli ham (Black Forest ham is amazing here) on top of the cheese before putting the top layer of rolls on. Crispy, crumbled bacon or shredded rotisserie chicken are also fantastic additions.
Don’t be afraid to play around with the cheese and herbs, either. For a spicier kick, swap out the cheddar or mozzarella for pepper jack cheese and add a pinch of red pepper flakes to your butter mixture. For a more sophisticated, Italian-inspired flavor, use provolone and mozzarella cheese and add a thin layer of pesto on the bread before adding the cheese. You can also brush the tops of the rolls with a different butter mixture. A popular variation involves melted butter mixed with a little Dijon mustard, Worcestershire sauce, and poppy seeds, which creates a savory, tangy glaze that is absolutely addictive. These variations make the recipe incredibly versatile, perfect for when you need new snack ideas for work or a fresh take on a party favorite.
Can I use a different type of bread?
Absolutely! While the sweetness of the Hawaiian rolls is a key part of their charm, this recipe works wonderfully with other types of pull-apart dinner rolls. Brioche slider buns would be a fantastic, buttery alternative. Standard soft dinner rolls or potato rolls will also work well. The key is to use a soft, pull-apart style roll that comes in a connected slab so you can use the horizontal slicing method. Just be aware that changing the bread may slightly alter the baking time, so keep an eye on them as they bake.
Frequently Asked Questions
Can I make these mini grilled cheese sliders ahead of time?
Yes, you can do most of the prep work in advance. To make them ahead, assemble the sliders completely but do not bake them. Wrap the entire slab tightly in the aluminum foil and refrigerate for up to 24 hours. When you’re ready to serve, you can bake them straight from the fridge. You may need to add about 5-10 minutes to the initial baking time to ensure the cheese gets fully melted since you’re starting with a cold sandwich.
How do I store and reheat leftovers?
If you have any leftovers (which is rare!), you can store them in an airtight container in the refrigerator for up to 3 days. To reheat, the best method is in the oven or an air fryer to help re-crisp the bread. Place them on a baking sheet and heat in a 350°F (175°C) oven for about 10 minutes, or until warmed through and the cheese is melty again. Microwaving will work in a pinch, but the rolls will be much softer.
What should I serve with these sliders?
These mini grilled cheese sliders are fantastic on their own, but they also pair wonderfully with a variety of sides. For a light meal or party spread, serve them alongside a simple green salad, a bowl of tomato soup for dipping, or some crunchy potato chips. They are also great with classic cookout sides like coleslaw, potato salad, or a fresh fruit platter, making them a perfect addition to your list of grill out appetizers.
A Perfect Snack for Any Occasion
These Mini Grilled Cheese Hawaiian Rolls are more than just a recipe; they’re a solution. They are the answer to what to bring to a potluck, what to make for a quick weeknight dinner, and how to satisfy a crowd of hungry guests without spending hours in the kitchen. They are one of the most reliable and beloved snacks to cook in my entire repertoire. The combination of sweet, savory, buttery, and cheesy is simply irresistible, and the fact that they come together so quickly feels like a magic trick. I encourage you to give this recipe a try the next time you need something that is guaranteed to bring smiles to people’s faces. It’s a simple, comforting, and delicious dish that you will find yourself making over and over again.
Mini Grilled Cheese Hawaiian Rolls
Ingredients
Equipment
Method
- Preheat and Prepare: Get your oven preheating to 350°F (175°C). Grab a baking sheet and a large piece of aluminum foil.
- Slice the Rolls: Using a long, serrated bread knife, carefully slice the entire slab of Hawaiian rolls in half horizontally.
- Butter Them Up: In a small bowl, mix the softened butter with the garlic powder and optional dried herbs. Generously spread this garlic herb butter over the cut sides of both the top and bottom sections of the rolls.
- Layer the Cheeses: Set the bottom half of the rolls on the aluminum foil. Sprinkle the shredded cheddar and mozzarella cheese evenly over the buttered bottom layer.
- Assemble the Sliders: Carefully place the top half of the rolls back onto the cheese-covered bottom half.
- Wrap for Baking: Tightly wrap the entire block of sandwiches in the aluminum foil to trap steam and melt the cheese.
- Bake to Perfection: Place the foil-wrapped rolls in the oven and bake for 15-20 minutes, until the cheese is completely melted and bubbly.
- Get that Golden Top: Carefully unwrap the top of the foil, exposing the tops of the rolls. Return them to the oven for another 3-5 minutes until deep golden-brown and slightly crispy.
- Rest and Serve: Remove the sliders from the oven and let them cool for a minute or two. Use a bread knife to cut them into individual mini sandwiches and serve immediately.