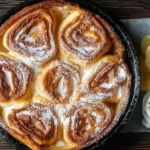
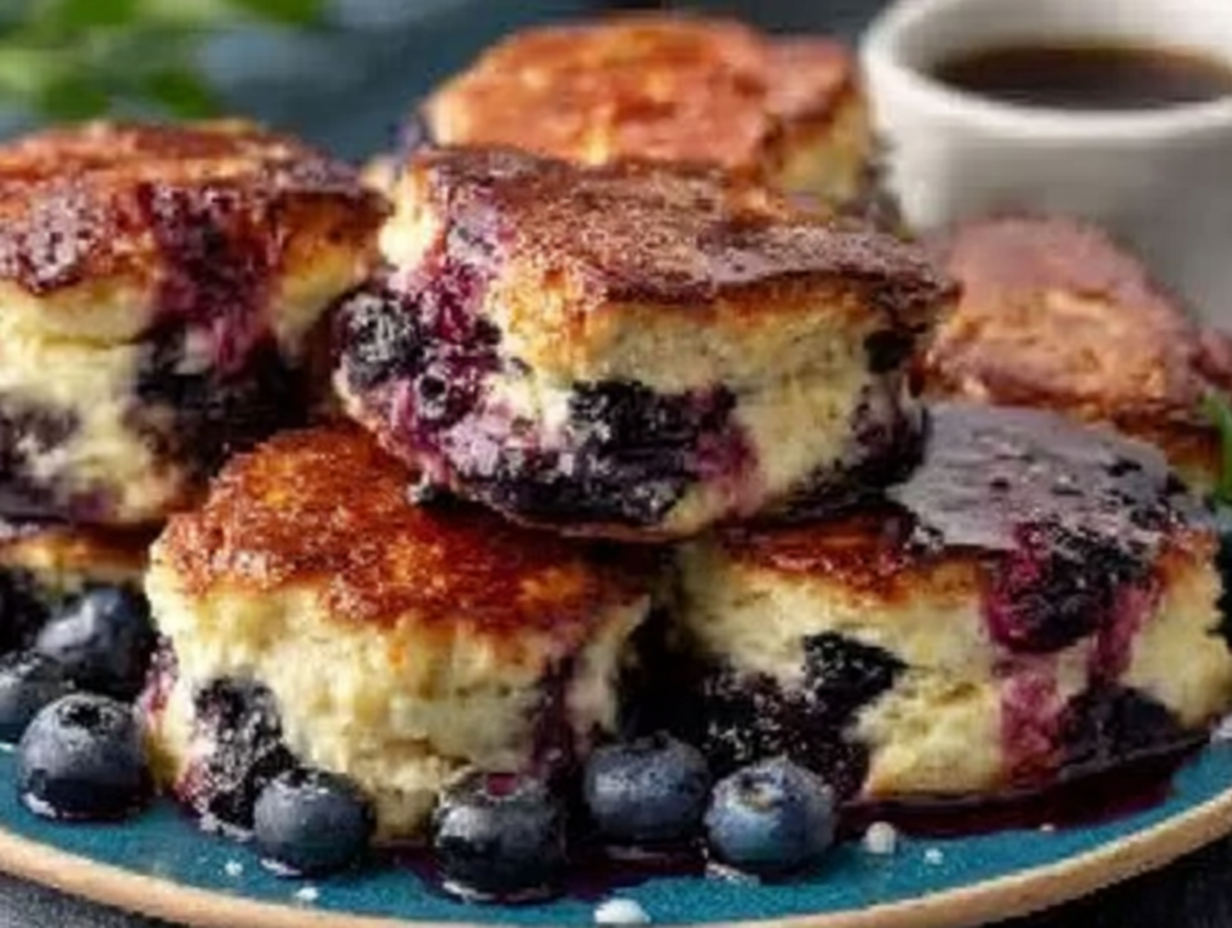
There’s a certain magic to weekend mornings, isn’t there? The world feels a little slower, the coffee tastes a little better, and the kitchen calls out for something special. For me, that something special is often these homemade Blueberry Biscuits. This isn’t one of those complicated recipes that requires a dozen bowls and a full morning of work. It’s the opposite. It’s simple, honest-to-goodness baking that fills the house with the scent of warm butter and sweet berries, creating a perfect centerpiece for a Homemade Holiday Breakfast. It’s the kind of recipe that reminds me of my grandmother’s kitchen, where the best treats were always made with love and a handful of simple ingredients. These biscuits are pillowy soft, unbelievably fluffy, and so full of juicy blueberries they practically burst in your mouth. They’re a world away from the elaborate, time-consuming brunch dishes like a Cinnamon Roll French Toast Casserole; instead, they offer a rustic, comforting charm that feels both nostalgic and wonderfully immediate.
What I love most about this recipe is its versatility. It’s my go-to for a lazy Sunday morning, but it’s also special enough to serve when we have guests. They come together in under 30 minutes, which means you can have warm, fresh-from-the-oven biscuits on the table before anyone’s even finished their first cup of coffee. The dough is wonderfully forgiving, a soft, shaggy mass that doesn’t demand perfection. You just pat it out, cut your rounds, and let the oven do the rest. Each bite is a perfect balance of tender, flaky biscuit and sweet, tangy blueberries. They’re incredible on their own, but a little smear of butter or a drizzle of honey sends them right over the top. Forget fussy Breakfast French Toast Roll Ups; this is the kind of simple, satisfying bake that creates real memories.
Ingredients for Blueberry Biscuits
- 2 cups all-purpose flour
- 1 tablespoon baking powder
- 1/2 teaspoon salt
- 2 tablespoons sugar
- 1/2 cup unsalted butter (cold and cubed)
- 3/4 cup buttermilk (or make your own by adding 1 tbsp of vinegar or lemon juice to regular milk and letting it sit for 5 minutes)
- 1 cup fresh or frozen blueberries
- 1 teaspoon vanilla extract (optional, but recommended)
How to Make Blueberry Biscuits: Instructions
- First things first, get your oven preheating to 425°F (220°C). This high heat is crucial for getting a good, quick rise on the biscuits. Go ahead and line a baking sheet with parchment paper to prevent any sticking.
- In a large mixing bowl, whisk together the dry ingredients: the all-purpose flour, baking powder, salt, and sugar. Giving them a good whisk helps distribute everything evenly, so you don’t get a pocket of salt in one biscuit.
- Now for the most important part: the butter. Add your cold, cubed butter to the flour mixture. Using your fingertips, a pastry cutter, or even two knives, cut the butter into the flour until the mixture resembles coarse crumbs with some pea-sized pieces of butter still visible. Those little butter pockets are what create steam and make the biscuits flaky, so don’t overdo it!
- Gently fold in your blueberries. If you’re using frozen berries, don’t thaw them first—just toss them right in. Be gentle here; you want to keep the berries whole so they burst with juice when they bake.
- Pour in the buttermilk and the optional vanilla extract. Use a spatula or wooden spoon to mix everything together until it just forms a shaggy, slightly sticky dough. The key is to stop mixing as soon as it comes together. Overmixing develops gluten and leads to tough biscuits.
- Turn the dough out onto a lightly floured surface. It will look a bit messy, and that’s okay! Gently press and pat the dough into a rectangle about 1-inch thick. Don’t be tempted to use a rolling pin, as the warmth from your hands is all you need. Use a biscuit cutter or a sharp knife to cut out your biscuits.
- Carefully place the biscuits on the prepared baking sheet. For softer sides, you can place them close together, almost touching. For crispier edges, leave an inch or two between them.
- Bake for 15 to 18 minutes. You’re looking for them to be beautifully risen and a light golden brown on top. The whole kitchen will smell incredible, making this a perfect recipe for a Homemade Holiday Breakfast. Let them cool for just a minute before serving warm with butter, honey, or a simple dusting of powdered sugar.
Tips & Tricks for Perfect Blueberry Biscuits
Over the years, I’ve learned that a few small details can take your blueberry biscuits from good to absolutely unforgettable. The biggest secret? Temperature. Your butter and buttermilk must be cold, straight from the fridge. When those cold bits of butter hit the high heat of the oven, they release steam, creating little air pockets that result in a light, flaky, and tender crumb. If your butter gets warm and melts into the flour before baking, you’ll end up with dense, tough biscuits. If your kitchen is particularly warm, I even suggest cubing your butter and then popping it in the freezer for about 10 minutes before you start. This simple step is a game-changer and ensures you get that perfect, pillowy texture every single time, making your biscuits a standout dish, far simpler than tackling Cinnamon Roll French Toast Roll Ups on a busy morning.
Another common pitfall is overworking the dough. It’s so tempting to keep kneading and mixing until everything is perfectly smooth, but for biscuits, that’s the enemy. A shaggy, slightly sticky, and lumpy dough is exactly what you want. The moment the flour is hydrated and it comes together, stop mixing. The less you handle it, the more tender your biscuits will be. When you turn it out onto your floured surface, gently pat it into shape. For an extra flaky biscuit, you can try a simple lamination trick: pat the dough into a rectangle, fold it into thirds like a letter, and then gently pat it back out to a 1-inch thickness before cutting. This creates even more delicious, buttery layers. Trust the process and embrace the imperfect look of the dough; the final result will be worth it.
Why did my biscuits spread out instead of rising up?
This is a common question, and it usually comes down to one of two things: your dough was too wet, or your butter was too warm. If the dough seems overly sticky and wet, you can add a tiny bit more flour, a tablespoon at a time. More often than not, though, the culprit is warm butter that has already melted into the flour. Also, when cutting your biscuits, make sure you press the cutter straight down and pull it straight up. Twisting the cutter can seal the edges of the biscuit, preventing it from rising to its full, fluffy potential.
Blueberry Biscuits: Substitutions & Variations
While the classic blueberry biscuit is a thing of beauty, this recipe is also a fantastic canvas for your own creativity. One of the easiest swaps is the fruit itself. While blueberries are wonderful, you can easily substitute them with other berries like chopped fresh strawberries, raspberries, or even blackberries. In the fall, finely diced apple with a pinch of cinnamon is a delicious variation. If you’re using a particularly juicy fruit, you may want to toss it in a tablespoon of flour before adding it to the dough to prevent it from making the biscuits too wet. This adaptability makes it a great base recipe for any season.
You can also play with the flavor profile of the dough. For a brighter, zesty biscuit, add the zest of one lemon to your dry ingredients along with the sugar. The combination of lemon and blueberry is a classic for a reason! For a warmer, spicier note, a half teaspoon of cinnamon or a quarter teaspoon of ground nutmeg can be whisked in with the flour. If you want to take these biscuits into dessert territory, consider adding a simple glaze on top once they’ve cooled slightly. A mix of powdered sugar, a splash of milk, and a little vanilla or lemon juice creates a beautiful finishing touch. Imagine one of these warm, glazed biscuits served as a Homemade Breakfast With Ice Cream—a scoop of vanilla bean would be absolute perfection.
Can I make these dairy-free or vegan?
Absolutely. To make these biscuits dairy-free, you can use a high-quality, firm plant-based butter in place of the dairy butter. Make sure it’s very cold, just like you would with regular butter. For the buttermilk, you can create a vegan version by mixing ¾ cup of unsweetened almond, soy, or oat milk with one tablespoon of lemon juice or apple cider vinegar. Let it sit for about 5-10 minutes to curdle slightly before adding it to the dough. The results are just as tender and delicious.
Frequently Asked Questions
Can I use frozen blueberries?
Yes, you absolutely can! Frozen blueberries work wonderfully in this recipe. The key is to not thaw them before you start. Add them to the dough directly from the freezer. This prevents them from bleeding their color throughout the dough and also helps keep the dough cold, which contributes to a flakier biscuit.
How do I store leftover blueberry biscuits?
Biscuits are always best the day they are made, but you can store any leftovers in an airtight container at room temperature for up to three days. To reheat them and bring back some of their fresh-baked texture, you can warm them in a 350°F (175°C) oven for about 5-7 minutes.
Can I make the dough ahead of time?
You can! You can prepare the dough, cut out the biscuits, and place them on the baking sheet. Then, cover them tightly with plastic wrap and refrigerate for up to 24 hours. When you’re ready to bake, just preheat your oven and bake them straight from the fridge. You may need to add an extra minute or two to the baking time.
A Perfect Weekend Treat
There is something deeply satisfying about pulling a tray of golden-brown Blueberry Biscuits from the oven. It’s a simple act of creation that yields such a wonderfully delicious reward. This recipe isn’t just about the food; it’s about the feeling it evokes—of comfort, of care, and of slowing down to enjoy a simple pleasure. Whether you’re making them for a special Homemade Holiday Breakfast or just as a treat for yourself on a quiet Saturday, these biscuits are sure to bring a little bit of joy to your table. So go ahead, gather your ingredients, and fill your home with the incredible aroma of baking. I promise, that first bite of a warm, buttery, berry-filled biscuit will make it all worthwhile.
Homemade Blueberry Biscuits
Ingredients
Equipment
Method
- First things first, get your oven preheating to 425°F (220°C). This high heat is crucial for getting a good, quick rise on the biscuits. Go ahead and line a baking sheet with parchment paper to prevent any sticking.
- In a large mixing bowl, whisk together the dry ingredients: the all-purpose flour, baking powder, salt, and sugar. Giving them a good whisk helps distribute everything evenly, so you don’t get a pocket of salt in one biscuit.
- Now for the most important part: the butter. Add your cold, cubed butter to the flour mixture. Using your fingertips, a pastry cutter, or even two knives, cut the butter into the flour until the mixture resembles coarse crumbs with some pea-sized pieces of butter still visible. Those little butter pockets are what create steam and make the biscuits flaky, so don’t overdo it!
- Gently fold in your blueberries. If you’re using frozen berries, don’t thaw them first—just toss them right in. Be gentle here; you want to keep the berries whole so they burst with juice when they bake.
- Pour in the buttermilk and the optional vanilla extract. Use a spatula or wooden spoon to mix everything together until it just forms a shaggy, slightly sticky dough. The key is to stop mixing as soon as it comes together. Overmixing develops gluten and leads to tough biscuits.
- Turn the dough out onto a lightly floured surface. It will look a bit messy, and that’s okay! Gently press and pat the dough into a rectangle about 1-inch thick. Don’t be tempted to use a rolling pin, as the warmth from your hands is all you need. Use a biscuit cutter or a sharp knife to cut out your biscuits.
- Carefully place the biscuits on the prepared baking sheet. For softer sides, you can place them close together, almost touching. For crispier edges, leave an inch or two between them.
- Bake for 15 to 18 minutes. You’re looking for them to be beautifully risen and a light golden brown on top. The whole kitchen will smell incredible, making this a perfect recipe for a Homemade Holiday Breakfast. Let them cool for just a minute before serving warm with butter, honey, or a simple dusting of powdered sugar.