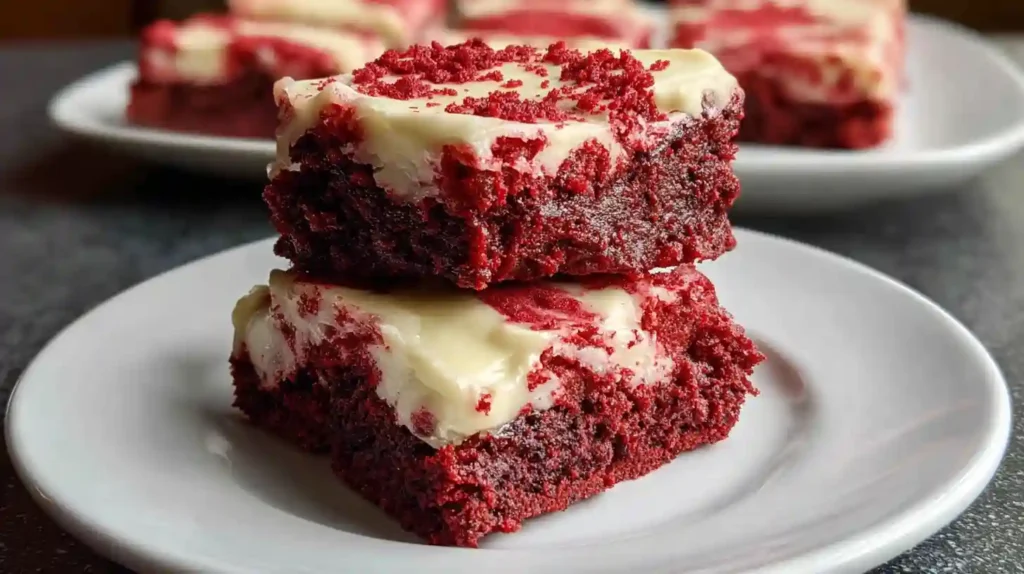
There’s something about the first time you slice into a pan of properly made red velvet brownies from scratch the way the deep crimson color contrasts with creamy white frosting, how the knife glides through that fudgy center. I spent years tweaking traditional brownie recipes before I landed on this particular combination.
The texture sits somewhere between cake and brownie, which honestly makes these homemade red velvet brownies better than either option alone. The cream cheese frosting isn’t just decoration here; it’s what transforms good brownies into something you’ll make again and again.
Essential Ingredients for Red Velvet Brownie Recipes
Getting the ingredient ratios right makes the difference between dense, cake-like squares and the fudgy texture most people want. Start with unsalted butter melted, not softened. Both granulated and light brown sugar contribute to that chewy edge. The brown sugar adds moisture and a subtle molasses note that complements the cocoa.
- All-purpose flour measured by weight or using the scoop-and-level method
- Unsweetened cocoa powder for depth without overpowering
- White vinegar for authentic red velvet flavor
- Red food coloring (gel works better than liquid for intensity)
- Large eggs at room temperature
- Pure vanilla extract
For the cream cheese frosting, use full-fat cream cheese straight from the refrigerator if you’re working with dairy-free versions. Regular cream cheese should sit at room temperature for about 30 minutes before mixing.
How To Make Red Velvet Brownies From Scratch
Preparation takes less time than you’d think. Heat your oven to 350°F and line an 8×8-inch metal pan with parchment paper, leaving excess hanging over two sides for easy removal later. Metal pans conduct heat more evenly than glass, which tends to create overdone edges and undercooked centers.
Mixing the Batter
Melt the butter completely either in the microwave in 15-second intervals or in a small saucepan on low heat. Pour it into a medium mixing bowl and let it cool for a minute. Whisking in the sugars while the butter is still warm helps dissolve them partially, creating a smoother texture. Beat until the mixture forms a thick paste that pulls away from the bowl’s sides.
Add the egg, vinegar, vanilla, and food coloring. Mix thoroughly but don’t overbeat. The batter should look glossy and evenly colored. If the red seems too pale, add another drop or two of coloring now rather than trying to fix it later. Sift in the flour, cocoa powder, and salt, then fold gently until you see no dry streaks. Overmixing at this stage creates tough, dense brownies.
Baking Tips
Spread the batter evenly in your prepared pan. The surface won’t look smooththat’s normal. Bake for 30 to 40 minutes, checking at the 30-minute mark. The top should look crackly and set, and a toothpick inserted in the center should emerge with moist crumbs clinging to it, not wet batter. Underbaking slightly is better than overbaking, which creates dry, crumbly results.
Cream Cheese Frosting That Actually Works
Most cream cheese frostings turn runny or separate. This one doesn’t, thanks to a few specific techniques. Beat the cream cheese with softened butter until completely smooth—no lumps. The salt and vanilla go in next, followed by powdered sugar added gradually. Stop when you reach spreading consistency; adding too much sugar makes the frosting grainy and overly sweet.
For dairy-free versions, add a teaspoon of cornstarch or tapioca starch to help stabilize the frosting. Dairy-free cream cheese has higher water content, and the starch compensates. Keep the frosting refrigerated until the brownies cool completely—warm brownies will melt it into a mess.
Easy Red Velvet Brownies: Common Problems
Glass pans are the most frequent culprit when brownies take too long to bake or cook unevenly. Switch to metal if possible. If you only have glass, reduce the oven temperature by 25°F and extend the baking time. Check for doneness by look and feel rather than relying solely on timing.
Brownies that turn out cakey instead of fudgy usually suffered from too much flour. Always measure flour by weight if you have a scale, or use the scoop-and-level method: fluff the flour in its container, scoop it into your measuring cup, and level the top with a knife. Never pack it down or tap the cup.
Creative Variations
Once you’ve mastered the basic red velvet brownie recipe homemade version, try these modifications. Swirl in white chocolate chips before baking for extra richness. For holiday versions, add crushed peppermint or swap red food coloring for green. Mini chocolate chips scattered on top of the frosting add texture contrast.
- Marbled brownies: Reserve half the cream cheese frosting, swirl it into the batter before baking
- Double chocolate: Add 1/2 cup dark chocolate chips to the batter
- Nutty brownies: Fold in 1/2 cup chopped pecans or walnuts
- Espresso boost: Add 1 teaspoon instant espresso powder to deepen chocolate flavor
Storage and Make-Ahead Instructions
Frosted brownies need refrigeration because of the cream cheese. They’ll keep for four days in an airtight container. Unfrosted brownies can stay at room temperature for three to four days if you cover the pan tightly with aluminum foil. Make the frosting up to three days ahead and store it in the fridge, letting it come to room temperature and giving it a quick stir before spreading.
For longer storage, freeze unfrosted brownies for up to three months. Wrap individual squares in plastic wrap, then place them in a freezer bag. Thaw at room temperature for about an hour before frosting and serving.
Ingredient Substitutions
Dairy-free versions work well with plant-based butter and cream cheese. The texture changes slightly—expect a bit less richness—but the flavor remains solid. Coconut oil can replace butter in a pinch, though it adds a subtle coconut taste. For egg substitutes, use flax eggs (1 tablespoon ground flaxseed mixed with 3 tablespoons water per egg, left to gel for 5 minutes).
Natural food coloring produces a more muted red-brown rather than vibrant red. Beet powder works but affects the taste. If you prefer natural options, accept the color difference or increase the amount gradually while tasting as you go.
Scaling the Recipe
Double everything to fill a 9×13-inch pan. The baking time drops to 20-35 minutes for the thinner layer. Check at 20 minutes and watch carefully—larger pans create more edge pieces that can dry out quickly. For a crowd, this size yields about 24 squares.
Halving the recipe doesn’t work as well because the pan size becomes awkward. Stick with the 8×8 version and freeze extras instead.
Serving Suggestions
Cut these brownies into small squares—they’re rich enough that a little goes far. A 2-inch square is plenty for most people. Serve them cold from the refrigerator for clean cuts and maximum fudginess, or let them sit at room temperature for 15 minutes for a softer texture.
They pair well with strong coffee or cold milk. For dessert presentation, add a dusting of cocoa powder over the cream cheese frosting or garnish with fresh berries. Valentine’s Day calls for heart-shaped cookie cutters pressed into the pan before frosting—wasteful on the scraps, but impressive.
Frequently Asked Questions
Why are my red velvet brownies taking longer to bake?
Glass baking dishes conduct heat differently than metal ones, requiring more time. If you’re stuck with glass, lower your oven temperature to 325°F and add 5-10 minutes to the baking time. Check for a crackly top and moist crumbs on a toothpick rather than timing alone.
Can I make these brownies ahead of time?
Yes. Bake the brownies up to three days early, leaving them unfrosted and covered tightly at room temperature. Make the frosting separately and refrigerate it. Frost them a few hours before serving for the best texture and appearance.
What’s the difference between red velvet cake and red velvet brownies?
Brownies have a denser, fudgier texture with less flour and more fat than cake. The flavor profile is similar—cocoa, vanilla, vinegar—but brownies skip the buttermilk and use a different ratio of wet to dry ingredients. The result is chewier with more concentrated flavor.
Do I have to use food coloring?
No, but without it you’ll get brown brownies with red velvet flavor. The color is mostly aesthetic. If you skip the food coloring, reduce the cocoa powder slightly to compensate for the visual darkness.
Can I make this in a 9×13 pan?
Double all ingredients for a 9×13 pan. The brownies will be thinner, so reduce baking time to 20-35 minutes. Start checking at 20 minutes to prevent overbaking.
How do I know when the brownies are done?
The top should look set and slightly crackled. A toothpick inserted two inches from the edge should come out with a few moist crumbs attached but no wet batter. The center will firm up as the brownies cool, so slight underbaking is better than overbaking.
Why is my cream cheese frosting runny?
Either the cream cheese was too warm or you didn’t add enough powdered sugar. Chill the frosting for 20 minutes if it’s too soft. For dairy-free cream cheese, add cornstarch to help stabilize it since plant-based versions have higher moisture content.
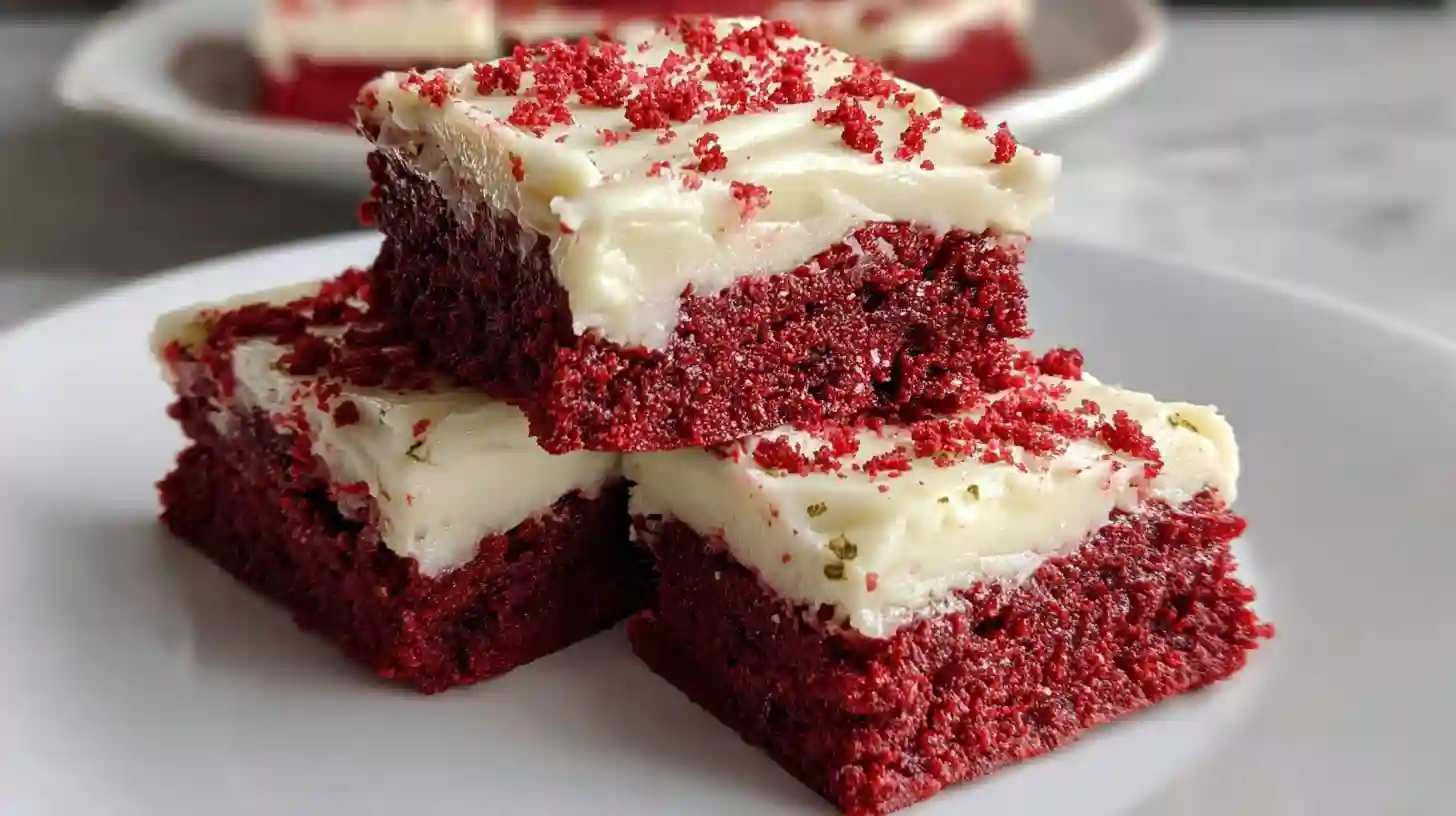
Red Velvet Brownies With Cream Cheese Frosting
Ingredients
Equipment
Method
- Preheat your oven to 350°F. Line an 8×8-inch metal baking pan with parchment paper, leaving excess hanging over two sides.
- Melt the butter completely in the microwave or on the stovetop. Pour into a medium mixing bowl and let cool for 1 minute.
- Add both sugars to the melted butter and whisk vigorously until the mixture forms a thick paste that pulls away from the bowl sides, about 2 minutes.
- Mix in the egg, white vinegar, vanilla extract, and red food coloring until smooth and evenly colored. Add more food coloring if needed for desired shade.
- Sift in the flour, cocoa powder, and salt. Fold gently with a spatula until no dry streaks remain. Do not overmix.
- Pour the batter into your prepared pan and spread evenly. Bake for 30-40 minutes, checking at 30 minutes. The top should be crackly and a toothpick should come out with moist crumbs, not wet batter.
- Remove from oven and let cool completely in the pan, about 2 hours.
- While brownies cool, make the frosting: Beat the cream cheese and butter together with an electric mixer until completely smooth and fluffy, about 2 minutes.
- Add vanilla extract and salt, then gradually beat in powdered sugar until you reach spreading consistency. If using dairy-free cream cheese, add cornstarch.
- Refrigerate the frosting until brownies are completely cool.
- Once brownies are cool, spread the cream cheese frosting evenly over the top. Cut into 16 squares and serve.