There’s something magical about a classic grilled cheese sandwich. It’s the ultimate comfort food, a warm hug on a plate that tastes like childhood. But sometimes, even the most perfect classics deserve a playful twist. That’s where these incredible Grilled Cheese Roll Ups come in. This isn’t just a sandwich; it’s an experience. We’re taking all that gooey, cheesy goodness and rolling it into crispy, dippable batons of deliciousness that are impossible to resist. It’s a recipe that transforms a simple lunch into a fun, hands-on activity, perfect for getting kids excited about cooking or for creating a crowd-pleasing appetizer that disappears in minutes. This is more than just a recipe; it’s about creating a little bit of joy and a new food memory.
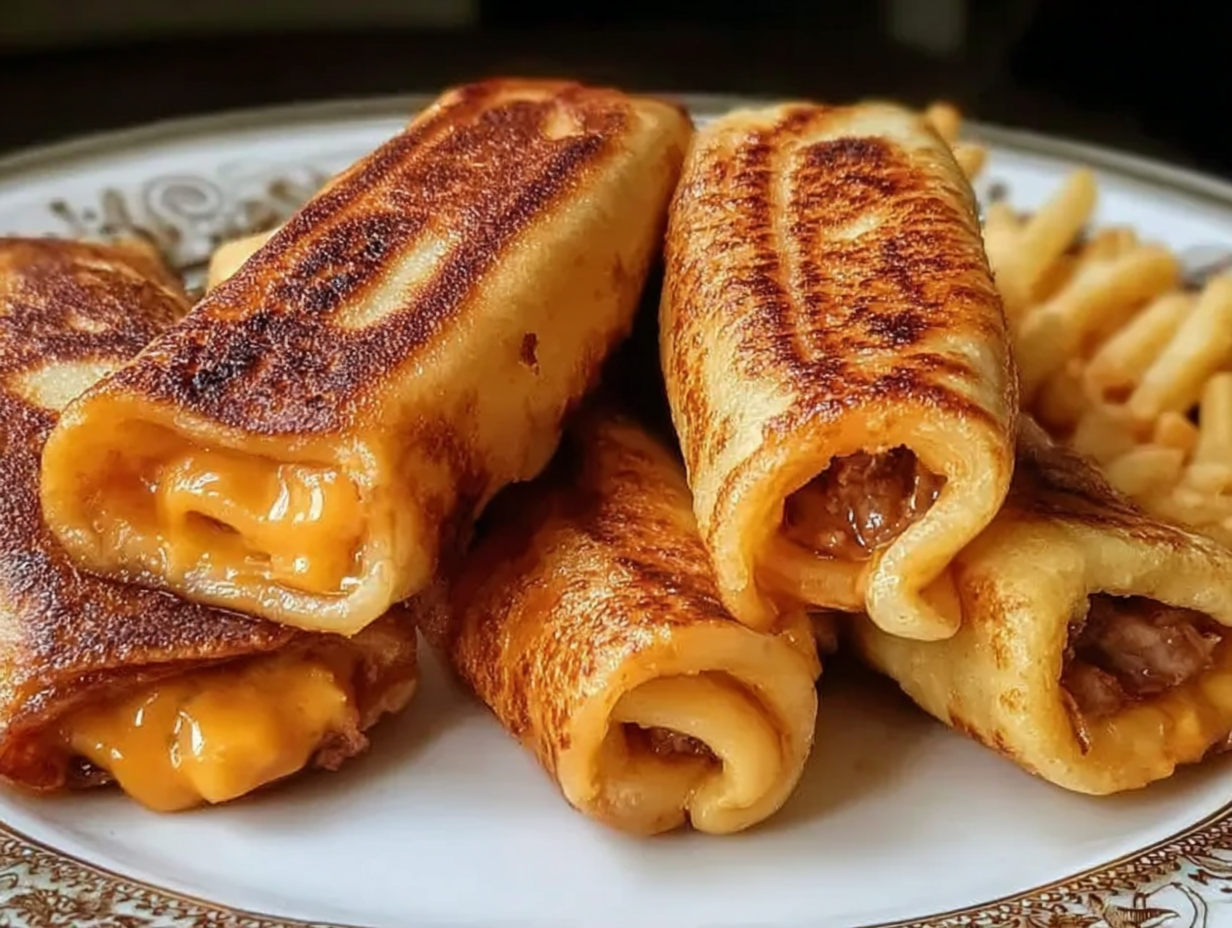
What I love most about this method is how it completely changes the texture. Instead of soft bread, you get a 360-degree crispy crunch that gives way to a perfectly melted, cheesy center. They are, without a doubt, the ultimate vessel for dipping into a warm bowl of tomato soup. But the fun doesn’t stop there. These roll ups are incredibly versatile. You can stick to the classic cheddar or venture into a gourmet Fruit Grilled Cheese by adding a smear of jam. Imagine a sweet and savory Blueberry Bacon Grilled Cheese roll up, or even a simple Sweet Grilled Cheese Sandwich with a sprinkle of cinnamon sugar. It’s a simple concept that opens up a world of flavor possibilities, turning a humble sandwich into something truly special.
Ingredients You’ll Need
- Bread: 8-10 slices of soft white sandwich bread with the crusts removed. The fresher and softer, the better. Wonder Bread or a similar brand is perfect because it’s so pliable and easy to roll without cracking.
- Cheese: 8-10 slices of your favorite melting cheese. Slices are generally neater for this, but shredded works in a pinch. Some great options include:
- Cheddar Cheese: Sharp and tangy, a true classic.
- American Cheese: The champion of melting, delivering that iconic creamy texture.
- Monterey Jack: Mild, buttery, and melts like a dream.
- Colby Jack: A mild and melty blend that’s always a crowd-pleaser.
- Provolone: Adds a slightly smoky, complex flavor with a fantastic cheese pull.
- Butter: 4-5 tablespoons of unsalted butter, softened to room temperature or melted. This is the key to getting that perfectly golden, crispy exterior.
- Optional Seasonings:
- Garlic Powder: A 1/4 teaspoon mixed into the butter adds a wonderful savory aroma.
- Paprika: A little pinch over the cheese adds color and a hint of smokiness.
- Dried Italian Herbs: A sprinkle of oregano or basil can give them a pizza-roll vibe.
Step-by-Step Instructions
- Flatten the Bread: Start by cutting the crusts off each slice of bread. On a clean counter or cutting board, place one slice of bread and use a rolling pin to flatten it out as thin as you can, almost like a small tortilla. Roll firmly but gently to avoid tearing. This step is the most important for ensuring your roll ups stay rolled!
- Add the Cheese: Place a slice of cheese along one edge of the flattened bread. If you’re using shredded cheese, arrange it in a neat line. This is also the time to sprinkle on any seasonings like paprika or herbs. Don’t overfill, or the cheese will all ooze out during cooking.
- Roll It Up: Starting from the cheese-topped edge, roll the bread up as tightly as you can into a neat little log. The flattened bread should stick to itself, but you can place the seam-side down to help it stay sealed. Repeat for all the slices.
- Butter Them Up: Now, get your butter ready. If you’re using melted butter, use a pastry brush to apply a thin, even coat over the entire surface of each roll-up. If your butter is softened, you can spread it on gently with a knife. This butter is what will give them that irresistible golden-brown crunch.
- Get Cooking: Heat a large skillet or griddle over medium-low heat. Carefully place the buttered roll-ups seam-side down in the pan. Don’t overcrowd the pan; cook in batches if needed. This ensures they cook evenly and get super crispy.
- Turn and Crisp: Cook for 2-4 minutes on the first side until beautifully golden and crisp. Then, using tongs, gently turn the roll-ups to cook on the other “sides.” Continue turning every minute or so until the entire roll-up is golden brown and the cheese inside is gloriously melted and gooey. This should take about 5-8 minutes in total.
- Serve Immediately: These are best enjoyed the second they come out of the pan. Serve them hot with your favorite dipping sauce and watch them disappear!
Tips for the Best Grilled Cheese Roll Ups
Making great grilled cheese roll ups is easy, but a few little tricks can take them from good to absolutely unforgettable. The most common frustration is having them unroll in the pan or turn out soggy instead of crispy. Let’s make sure that doesn’t happen. The first secret lies entirely in the bread. You must use soft, pliable sandwich bread, and you have to roll it thin. I mean really thin. If the bread is too thick or stale, it will crack as you roll it and won’t seal properly, leading it to pop open as soon as the cheese starts to melt. Take your time with the rolling pin; it’s the foundation of a successful roll up.
Another key area is heat management. It’s tempting to crank up the heat to get them done faster, but this is the quickest way to end up with burnt bread and a solid block of cheese in the middle. Medium-low heat is your best friend here. It allows the butter to sizzle gently, crisping up the bread to a perfect golden brown while giving the cheese inside enough time to melt into a molten, gooey river. Patience is crucial. Give them the full 2-4 minutes on the first side to form a solid crust before you even think about turning them. This initial sear helps lock the seam in place. This method is also a great starting point if you want to experiment with a Healthier Grilled Cheese; using an air fryer can achieve similar crispiness with less butter.
How do I keep the cheese from oozing out everywhere?
A little cheese leakage is a good thing—it creates those delicious, crispy bits on the outside of the roll up! However, a total cheese explosion can be messy. To prevent this, make sure you don’t overstuff the rolls. One slice of cheese (or a modest sprinkle of shredded cheese) is plenty. When you place the cheese, leave a small border of about 1/4 inch on the short sides. This gives the cheese a little room to expand as it melts without immediately spilling out. Finally, starting with the roll seam-side down helps create an initial seal that holds everything together as it cooks.
Substitutions and Fun Variations
Once you’ve mastered the basic recipe, you can start having some real fun. These roll ups are a blank canvas for all sorts of delicious experiments, both savory and sweet. Don’t be afraid to raid your fridge and pantry for inspiration. For savory versions, think about what you’d put in a gourmet panini. A sprinkle of bacon bits, a thin slice of prosciutto, or a few finely chopped jalapeños can be rolled in with the cheese for an extra kick. You can also mix up the cheeses; a combination of sharp cheddar and creamy provolone is fantastic. This is your chance to get creative and design the ultimate cheesy bite.
But the real game-changer is taking these into sweet territory. A Sweet Grilled Cheese is an unexpectedly delightful treat. Try making a Blueberry Cream Cheese Sandwich version by spreading a thin layer of cream cheese and a few fresh blueberries on the bread before rolling it up. When cooked, the blueberries burst and create a warm, jammy filling. For an even richer flavor, try a Blueberry Bacon Grilled Cheese variation with a smear of cream cheese, a sprinkle of bacon bits, and a few blueberries. You could also make a simple Sweet Grilled Sandwich by spreading a thin layer of Nutella or apple butter with a mild cheese like mozzarella. The combination of warm, crispy bread and a sweet, gooey filling is absolutely heavenly and works wonderfully for a special breakfast or dessert.
Can I use different types of bread?
While soft white sandwich bread is the easiest to work with due to its pliability, you can certainly experiment. A soft whole wheat or potato bread can work well. Breads that are denser or have a hard crust, like sourdough or rye, are not ideal for this recipe as they will crack and be very difficult to roll thinly. If you need a gluten-free option, use a soft, high-quality gluten-free sandwich bread. Be aware that it may be more delicate, so you’ll need to be extra gentle when rolling.
Frequently Asked Questions
Can I make grilled cheese roll ups ahead of time?
These are definitely best served hot and fresh right out of the skillet for maximum crispiness. However, you can do some prep work in advance. You can flatten the bread, add the cheese, and roll them up. Place them seam-side down on a baking sheet, cover tightly with plastic wrap, and refrigerate for up to 4 hours. When you’re ready to eat, just butter them and cook as directed.
What is the best dip for these roll ups?
The classic pairing is a warm bowl of creamy tomato soup, and for good reason! It’s a perfect match. But you don’t have to stop there. Marinara sauce, ranch dressing, or a garlic aioli are also fantastic savory dips. If you make a Sweet Grilled Cheese version, try dipping them in a fruit coulis, yogurt, or even a little bit of maple syrup.
Can I make these in an air fryer?
Yes, you can! The air fryer is a great way to make them extra crispy. Prepare the roll ups as directed, brushing them with melted butter. Place them in the air fryer basket in a single layer, seam-side down. Cook at 375°F (190°C) for 5-7 minutes, flipping them halfway through, until they are golden brown and the cheese is melted. They turn out wonderfully crunchy.
Conclusion
These Grilled Cheese Roll Ups are more than just a fun way to eat a classic sandwich; they’re a reminder that a little creativity in the kitchen can lead to the most delightful results. They prove that you don’t need complicated ingredients to make something that feels special and brings a smile to everyone’s face. Whether you’re serving them as an after-school snack, a party appetizer, or turning them into a Sweet Grilled Cheese Sandwich for a weekend brunch, they are guaranteed to be a hit. So go ahead, grab a rolling pin, and give this recipe a try. I have a feeling it’s going to become a new favorite in your home, just as it has in mine.
Grilled Cheese Roll Ups
Ingredients
Equipment
Method
- Start by cutting the crusts off each slice of bread. On a clean counter or cutting board, place one slice of bread and use a rolling pin to flatten it out as thin as you can.
- Place a slice of cheese along one edge of the flattened bread. Sprinkle on any optional seasonings. Do not overfill.
- Starting from the cheese-topped edge, roll the bread up as tightly as you can into a log. Place it seam-side down to help it stay sealed. Repeat for all slices.
- Apply a thin, even coat of melted or softened butter over the entire surface of each roll-up using a pastry brush or knife.
- Heat a large skillet or griddle over medium-low heat. Carefully place the buttered roll-ups seam-side down in the pan. Cook in batches if needed.
- Cook for 2-4 minutes on the first side until golden and crisp. Then, using tongs, gently turn the roll-ups to cook all sides. Continue turning every minute or so until the entire roll-up is golden brown and the cheese is melted, about 5-8 minutes in total.
- Serve immediately while hot with your favorite dipping sauce.