There’s something magical about the first batch of cookies you pull from the oven during the holiday season. Brown Butter Iced Oatmeal Cookies have become my personal winter ritual a tradition that started three years ago when I stumbled upon the idea of browning butter for cookie dough. The kitchen fills with this nutty, caramelized aroma that makes everyone in the house drift toward the oven.
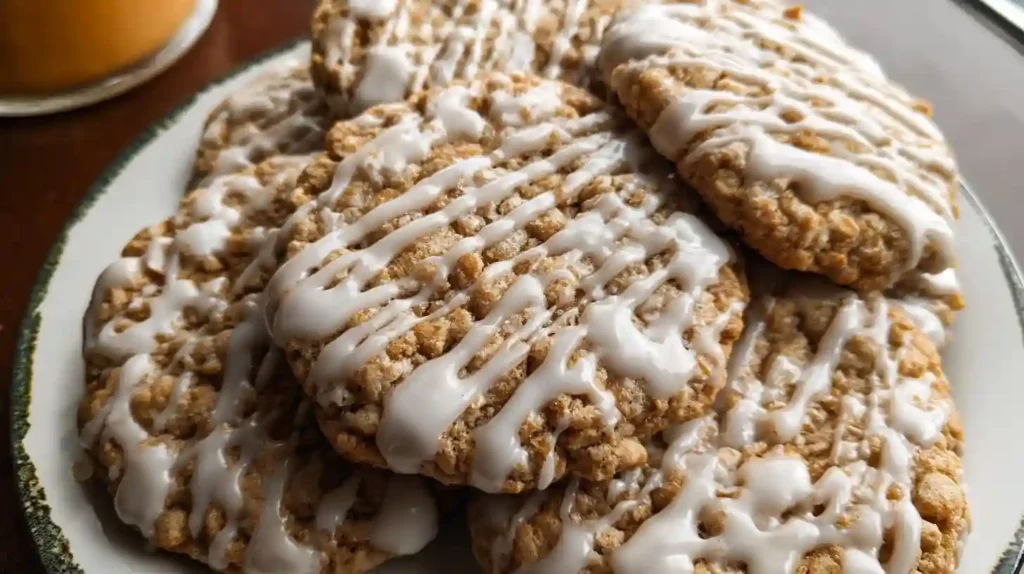
These aren’t your typical oatmeal cookies with raisins; instead, they’re tender, spiced beauties crowned with a glossy vanilla glaze that cracks gently when you bite through. When you want Christmas morning sweets that feel both nostalgic and elevated, this is the recipe that delivers every single time.
Why These Oatmeal Holiday Cookies Stand Out
Let me be honest—I’ve tried dozens of oatmeal cookie recipes over the years, and most left me underwhelmed. What makes these Brown Butter Iced Oatmeal Cookies different is the depth of flavor that comes from taking an extra five minutes to brown your butter. That transformation from pale yellow to golden amber creates a richness you simply can’t replicate with regular melted butter. The texture strikes that elusive balance between a soft center and edges that have just the right amount of chew. They’re sturdy enough to stack in gift boxes yet tender enough to melt on your tongue.
These oatmeal cookies with no raisins appeal to people who’ve always felt conflicted about traditional recipes. The glaze adds sweetness without making them cloying, and the warm spices—cinnamon, nutmeg, and a whisper of molasses—create layers of cozy flavor. I’ve served these at three different holiday parties, and each time, someone asks for the recipe before the evening ends.
Gathering Your Ingredients for Brown Butter Baking Recipes
You won’t need any specialty ingredients for these cookie butter oatmeal cookies—just quality pantry staples that come together beautifully. Start with unsalted butter (you’ll be browning this, so quality matters), granulated and brown sugars for depth, and old-fashioned rolled oats. I pulse the oats briefly in a food processor to create a mix of fine crumbs and chunkier pieces, which gives the cookies their signature craggy tops.
For the warm spice profile, ground cinnamon and nutmeg work in harmony with a tablespoon of molasses. Don’t skip the molasses—it adds moisture and a subtle complexity that elevates these beyond basic oatmeal rounds. You’ll also need all-purpose flour, baking soda, salt, eggs, and pure vanilla extract. The icing requires just powdered sugar, milk, and more vanilla. Simple components, extraordinary results.
How to Brown Butter Like a Pro
Browning butter intimidated me the first time I tried it, but once you understand the process, it becomes second nature. Cut your butter into tablespoon-sized pieces and place them in a light-colored saucepan over medium heat. The pale pan is important—it allows you to see the color change clearly as the butter transforms. Stir constantly with a wooden spoon or heat-resistant spatula as the butter melts, foams, and then begins to develop golden-brown specks.
Those little brown bits are milk solids caramelizing, and they’re the key to that nutty, almost toffee-like aroma. The whole process takes about five to seven minutes. Once you see amber-colored flecks and smell that distinctive toasted scent, immediately remove the pan from heat and pour the butter into a heatproof bowl. Let it cool for at least 20 minutes before continuing with your dough—this patience prevents scrambled eggs when you add them later.
Making Your Oatmeal Icing Cookies Step by Step
After your browned butter has cooled, whisk in both sugars until the mixture looks grainy and well combined. Add your eggs one at a time, whisking thoroughly after each addition, then stir in the vanilla and molasses. The batter will look slightly glossy at this stage. In a separate bowl, whisk together your flour, baking soda, cinnamon, nutmeg, and salt. Add your pulsed oats to the dry ingredients and give everything a quick stir.
Pour the dry mixture into the wet ingredients and switch to a large spatula. Fold gently until just combined—you should still see a few streaks of flour, which is perfect. Overmixing develops gluten and leads to tough cookies, so resist the urge to stir until perfectly smooth. The dough will feel slightly sticky and smell incredible. Cover the bowl with plastic wrap and refrigerate for at least three hours, though overnight is even better.
Shaping and Chilling
Once your dough is chilled, use a medium cookie scoop or your hands to portion out equal-sized balls. I recommend using a kitchen scale if you’re particular about uniformity—aim for about 1.5 ounces per cookie. Place them on a parchment-lined baking sheet, leaving about two inches between each one. Cover the entire sheet with plastic wrap and return it to the refrigerator while you preheat your oven to 350°F.
Baking January Baking Recipes to Perfection
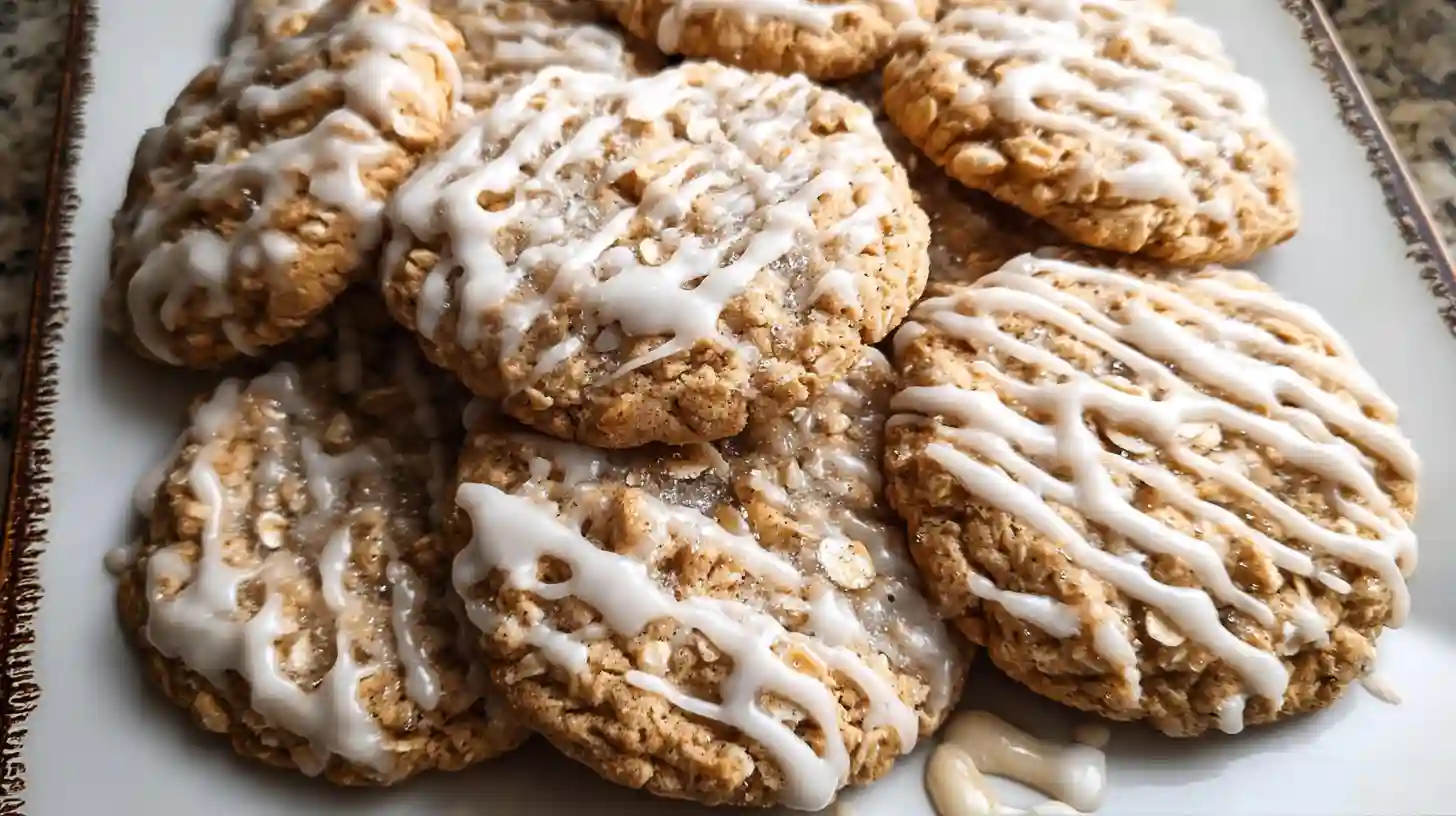
Position your oven rack in the center and bake one sheet at a time for consistent results. These cookies need about nine to ten minutes—watch them carefully near the end. The edges should look set and lightly golden while the centers remain puffy and slightly underdone. They’ll deflate a bit as they cool, creating those beautiful crackled surfaces that make these homemade holiday desserts so photogenic.
Let the cookies rest on the baking sheet for five to ten minutes before transferring them to a wire rack. This cooling period allows them to firm up just enough to move without breaking. While they cool completely, prepare your vanilla icing by whisking together powdered sugar, milk, and vanilla until you achieve a thick but pourable consistency.
Creating That Picture-Perfect Glaze
The icing technique makes all the difference in presentation. Pour your glaze into a shallow bowl—something wide enough to accommodate a cookie but not so deep that you’ll submerge the entire thing. Once your cookies have cooled to room temperature (this is crucial; warm cookies will cause the icing to melt and disappear), hold each cookie by the bottom and dunk just the top surface into the glaze.
You should feel slight resistance when you lift the cookie back up. Let excess icing drip off for a few seconds, then flip the cookie right-side up and place it back on the wire rack. The icing will pool slightly before setting into that iconic smooth, white cap. Allow about two hours for the glaze to fully set before stacking or packaging your oatmeal cookie ideas.
Pro Tips for Cookie Success
- Pulse your oats until you have a mixture of textures—some fine powder, some larger pieces
- Don’t skip the chilling time; cold dough spreads less and creates thicker cookies
- Use parchment paper or silicone baking mats to prevent sticking
- Rotate your baking sheet halfway through if your oven has hot spots
- Under-bake slightly rather than over-bake for the softest texture
Variations Worth Trying
These Brown Butter Iced Oatmeal Cookies are incredibly versatile. For a gingerbread twist during the holidays, increase the spices to 1½ teaspoons cinnamon, 1 teaspoon ground ginger, ¼ teaspoon nutmeg, and ¼ teaspoon ground cloves. Top them with a cinnamon-dusted glaze or even a brown sugar maple icing for something truly special.
If you want to add mix-ins, fold in chocolate chips, chopped pecans, or dried cranberries after combining your wet and dry ingredients. For a salted caramel version, drizzle cooled iced cookies with caramel sauce and sprinkle with flaky sea salt. Each variation brings something new while maintaining that signature tender crumb and buttery flavor.
Troubleshooting Common Issues
If your cookies spread too much, your butter was likely too warm when you mixed the dough, or you didn’t chill long enough. Make sure that browned butter has fully cooled and that your dough gets at least three hours in the refrigerator. Cookies that turn out too dry usually indicate over-baking—remember, they should look slightly under-baked in the center when you remove them from the oven.
Icing that’s too thin will slide right off the cookies and disappear. If this happens, whisk in more powdered sugar a tablespoon at a time until you reach that thick, clingy consistency. Conversely, if your icing is too thick to work with, add milk a teaspoon at a time. The perfect glaze should coat a spoon and drip slowly when lifted.
Storing Your Christmas Morning Sweets
Once the icing has completely set, store these cookies in an airtight container at room temperature for up to six days. They actually improve after a day or two as the glaze softens slightly and the flavors meld together. Layer them between sheets of parchment paper to prevent sticking.
For longer storage, these freeze beautifully. Wrap individual cookies in plastic wrap, then place them in a freezer-safe container or bag for up to three months. You can freeze them with or without the icing—both methods work well. Thaw at room temperature for about 30 minutes before serving. The texture remains remarkably close to freshly baked.
Substitutions and Dietary Adaptations
If you need to make these cookies dairy-free, use plant-based butter for browning—it works surprisingly well, though the flavor will be slightly different. For a gluten-free version, substitute a 1:1 gluten-free flour blend and make sure your oats are certified gluten-free. The texture may be slightly more crumbly, but they’ll still taste wonderful.
You can reduce the sugar slightly if you prefer less sweetness, though I wouldn’t recommend cutting more than ¼ cup from the total. The molasses can be swapped for honey or maple syrup in a pinch, but the flavor profile will shift. For egg-free baking, flax eggs work as a substitute, though the cookies may spread a bit more during baking.
Frequently Asked Questions
Can I make the dough ahead of time?
Absolutely. The dough keeps in the refrigerator for up to three days or can be frozen for three months. Shape it into balls before freezing, and you can bake directly from frozen—just add an extra minute or two to the baking time.
Why do my cookies turn out flat?
Flat cookies usually result from warm dough or expired baking soda. Make sure your dough is thoroughly chilled and check the expiration date on your leavening agents. Using a kitchen scale to measure flour accurately also helps.
Can I use quick oats instead of old-fashioned oats?
Quick oats will work in a pinch, but the texture won’t be quite as hearty and rustic. Old-fashioned rolled oats provide better structure and those appealing craggy surfaces.
How do I prevent the icing from cracking when I bite into the cookie?
A slight crack is actually normal and part of the charm, but if you want a more flexible icing, add a teaspoon of light corn syrup to your glaze. This keeps it from setting quite as hard.
What’s the best way to ship these cookies as gifts?
Wait until the icing is completely set, then layer the cookies in a sturdy container with parchment paper between each layer. Fill any empty spaces with crumpled parchment to prevent shifting during transit.
Brown Butter Iced Oatmeal Cookies
Ingredients
Equipment
Method
- Brown the butter: Cut butter into tablespoon-sized pieces and place in a light-colored saucepan over medium heat. Stir constantly as butter melts, foams, and develops golden-brown specks, about 5-7 minutes. Once amber-colored and fragrant, immediately pour into a heatproof bowl and cool for 20 minutes.
- Prepare oats: Pulse old-fashioned oats in a food processor until you have a mixture of fine crumbs and larger pieces. Set aside.
- Mix wet ingredients: In a large bowl, whisk cooled brown butter with both sugars until combined. Add eggs one at a time, whisking well after each. Stir in molasses and vanilla extract.
- Combine dry ingredients: In a separate bowl, whisk together flour, baking soda, cinnamon, nutmeg, and salt. Add pulsed oats and stir to combine.
- Form dough: Add dry ingredients to wet ingredients and fold gently with a spatula until just combined. Do not overmix. Cover bowl with plastic wrap and refrigerate for at least 3 hours or overnight.
- Shape and chill: Scoop chilled dough into 1.5-ounce balls and place on parchment-lined baking sheets. Cover with plastic wrap and refrigerate while preheating oven to 350°F.
- Bake: Bake one sheet at a time on center rack for 9-10 minutes, until edges are set and centers are puffy and slightly underbaked. Cool on baking sheet for 5-10 minutes, then transfer to wire rack to cool completely.
- Make glaze: Whisk together powdered sugar, milk, and vanilla until thick but pourable. Add more milk if needed to reach proper consistency.
- Glaze cookies: Pour icing into a shallow bowl. Dunk top of each completely cooled cookie into glaze, allowing excess to drip off. Place on wire rack and let set for 2 hours before serving or storing.