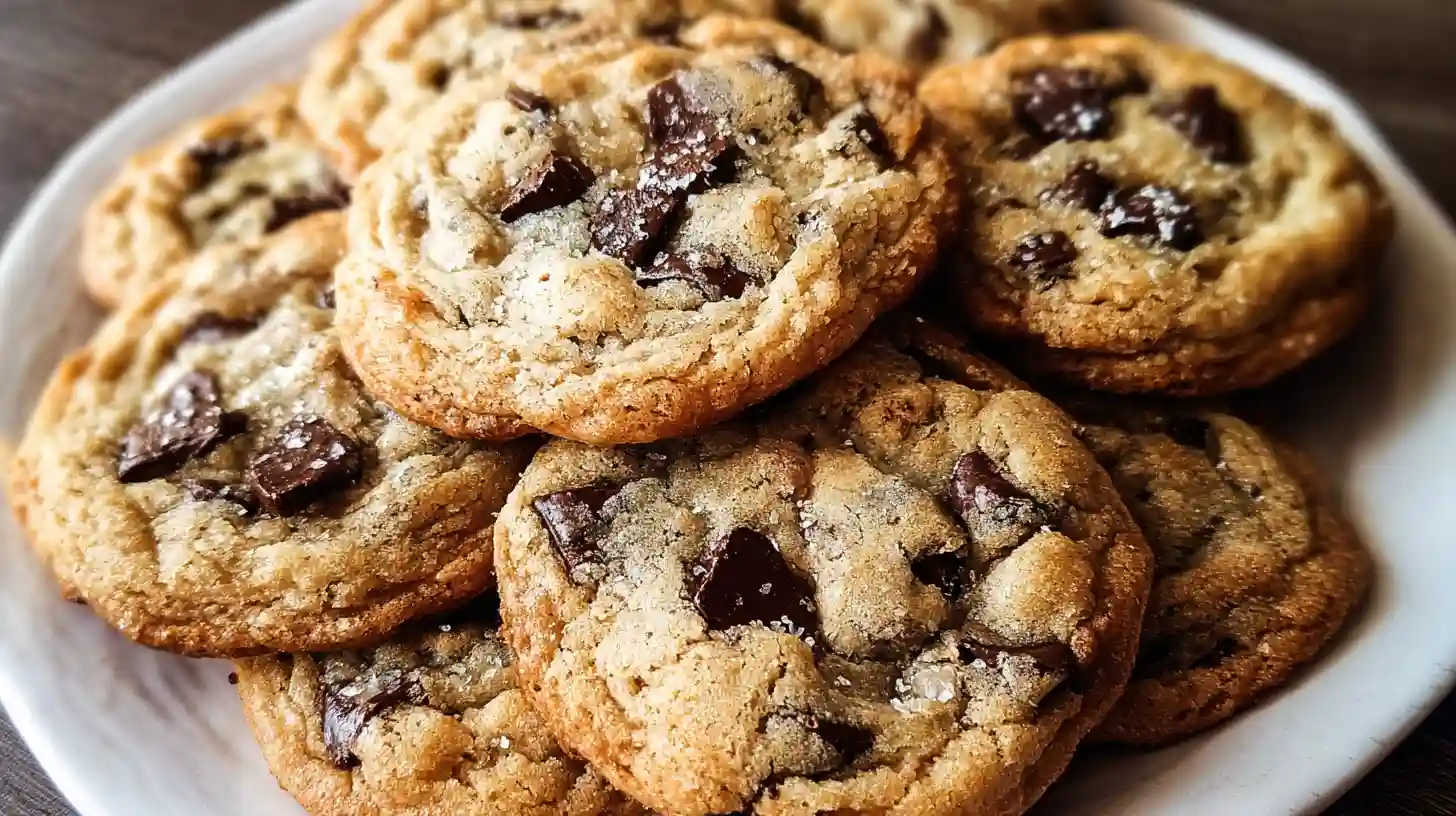
There’s this moment I still remember. Walking into my grandmother’s kitchen on a lazy Saturday afternoon, the smell of warm butter and melting chocolate practically pulling me through the door. She’d just pulled a batch of chocolate chip cookies from the oven golden, thick, with those perfect crackled tops you usually only see behind glass cases at expensive bakeries. That scent alone convinced me: nothing beats homemade. These bakery style chocolate chip cookies capture that exact feeling, transforming your kitchen into your favorite dessert destination.
What makes these cookies stand out isn’t some fancy technique or hard-to-find ingredient. It’s understanding a few small but crucial details that separate a decent cookie from one that makes people pause mid-conversation. The balance between chewy centers and those slightly crispy edges. The way chocolate chips pool in little pockets when you bite down. How the dough needs just enough rest to develop deeper flavors. Once you nail these elements, you’ll have people convinced you’ve opened a secret bakery in your home.
The Perfect Cookie Recipe
Creating the ultimate chocolate chip cookie recipe starts with room-temperature butter not melted, not cold from the fridge. You want it soft enough that your finger leaves an indent but firm enough to hold its shape. This detail matters more than most recipes let on. When you cream this butter with both granulated and brown sugar, tiny air pockets form, giving your cookies that signature tender crumb. I usually beat mine for about three minutes until the mixture looks almost fluffy and has lightened slightly in color.
The ratio of sugars determines texture more than anything else. Brown sugar brings moisture and chewiness thanks to its molasses content. Granulated sugar helps cookies spread and creates those crispy edges we’re after. Most recipes use roughly equal amounts, but feel free to adjust based on your preference. Want chewier cookies? Add an extra quarter cup of brown sugar. Prefer crispier edges? Tip the balance toward granulated.
Chewy And Crispy Cookie Texture
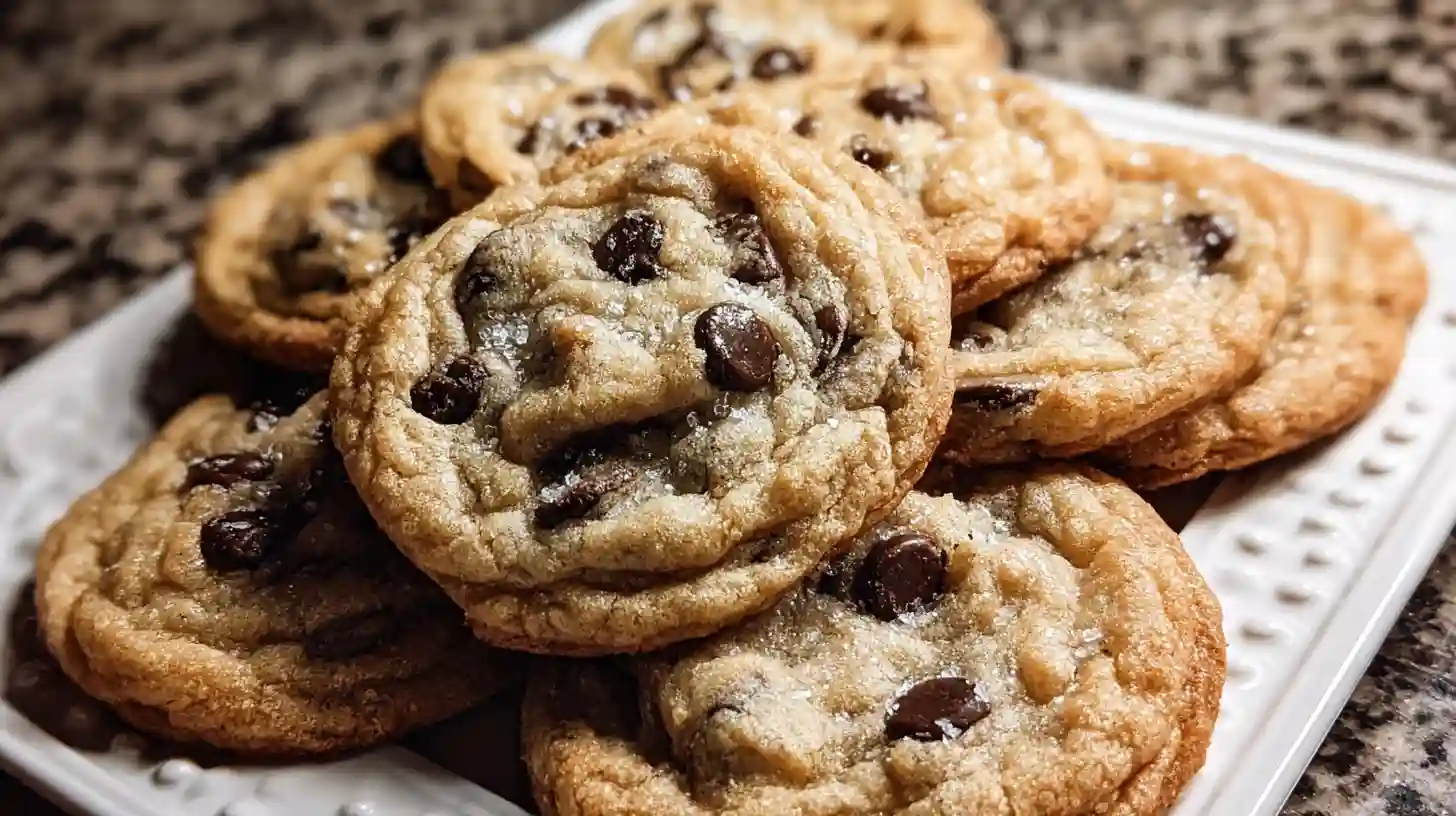
Achieving that bakery-worthy texture where each bite gives you both chewy softness and a satisfying crisp requires careful attention to baking time and temperature. The magic happens at 375°F hot enough to set the edges quickly while leaving centers slightly underdone. When you pull them from the oven, those centers might look almost raw. Don’t panic. They’ll continue cooking on the hot baking sheet for several minutes. This carryover baking is your secret weapon for perfect texture.
Thickness also plays a role. Scoop your dough into generous mounds rather than flattening them. Taller cookies stay softer in the middle while developing golden, slightly crunchy perimeters. I aim for about two tablespoons of dough per cookie, rolled into a ball but not pressed down. They’ll spread naturally as they bake, creating those beautiful irregular edges that look so artisanal.
Best Chocolate Chip Cookies Ever
The foundation of any great chocolate chocolate chip cookie recipe lies in ingredient quality. Cheap chocolate chips can taste waxy and artificial, while good ones melt into silky pools of chocolate heaven. I typically use a combination—semi-sweet chips for classic flavor and a handful of chopped dark chocolate for depth. The irregular chunks from hand-chopped chocolate create varied pockets of melted chocolate throughout each cookie, rather than uniform chips.
Vanilla extract matters too, though people often treat it as an afterthought. Real vanilla extract versus imitation makes a noticeable difference in the final flavor complexity. Add a full tablespoon instead of the teaspoon most recipes call for. That extra boost amplifies the buttery richness without making cookies taste specifically “vanilla-y.” It just makes everything taste more like itself, if that makes sense.
Easy At Home Cookie Recipes
One reason people love these cookies is their straightforwardness. You don’t need specialty equipment or professional training. A simple mixing bowl, wooden spoon, and basic measuring tools get the job done. Even the ingredient list stays manageable—butter, flour, sugars, eggs, vanilla, chocolate, baking soda, and salt. Nothing exotic or difficult to find. Yet the results rival anything you’d pay premium prices for at a boutique bakery.
The process itself takes maybe fifteen minutes of active work, plus chilling time. That chilling step is non-negotiable, though. When cookie dough rests in the refrigerator, several things happen. The flour fully hydrates, creating better structure. Flavors meld and deepen. Most importantly, the chilled dough spreads less during baking, giving you thicker cookies with better texture. I chill mine for at least two hours, sometimes overnight when I’m planning ahead.

Best Moist Chocolate Chip Cookies
Moisture comes from fat and sugar, but it’s easy to go overboard and end up with greasy cookies. The trick is balancing your wet and dry ingredients precisely. Too much flour makes cookies dry and cakey. Too little leaves them flat and oily. I always recommend measuring flour by weight if you have a kitchen scale, or at minimum, spoon flour into your measuring cup rather than scooping directly from the bag. Scooping compacts the flour, leading to too much in your dough.
Another moisture secret involves slightly underbaking. Those best moist chocolate chip cookies you’ve had at high-end bakeries? They’re pulled from the oven when centers still look shiny and barely set. They finish baking on the counter. This technique keeps cookies tender and soft even after they’ve cooled completely. If you bake until they look fully done in the oven, they’ll be dry and crumbly once cooled.
Cookies Recipes Homemade Tips
- Use room temperature eggs and butter for proper incorporation
- Don’t skip chilling the dough—it’s essential for texture
- Line baking sheets with parchment paper to prevent sticking
- Rotate baking sheets halfway through for even browning
- Add a pinch of sea salt on top before baking for flavor contrast
- Let cookies cool on the baking sheet for 5 minutes before transferring
Kitchen Aid Cookie Techniques
If you own a stand mixer like a KitchenAid, it makes the creaming process effortless. Use the paddle attachment and start on low speed to avoid butter flying everywhere. Once the butter and sugars begin combining, increase to medium speed for that fluffy texture. When adding flour, switch back to low speed and mix only until you stop seeing dry streaks. Overmixing develops gluten, making cookies tough instead of tender.
For those without a stand mixer, a handheld electric mixer works perfectly fine. Even a sturdy wooden spoon and some arm strength will do the job, though it takes longer. The key is proper creaming of butter and sugar regardless of your tool. This step incorporates air, creating lighter cookies. Rush through it, and you’ll end up with dense, heavy results.
Cookie Chocolate Chip Recipe Variations
Once you’ve mastered the basic recipe, variations become fun to explore. Try adding a teaspoon of espresso powder to amplify chocolate flavor without making cookies taste like coffee. Swap half the chocolate chips for white chocolate or butterscotch chips for different flavor profiles. Toss in a cup of chopped toasted pecans or walnuts for crunch and nutty richness.
For a more sophisticated version, use all dark chocolate and add a quarter teaspoon of flaky sea salt to the dough. The salt enhances sweetness while adding complexity. Or go in the opposite direction and make them extra indulgent with both chocolate chips and chunks of chocolate candy bars mixed throughout. Sometimes I throw in a handful of toffee bits for that buttery crunch that pairs so well with chocolate.
Troubleshooting Common Issues
Flat cookies usually mean your butter was too warm or you skipped chilling the dough. Make sure butter is softened but still cool to the touch, and always refrigerate dough before baking. If cookies spread too much anyway, try adding an extra tablespoon or two of flour to the dough. Conversely, if they stay thick and puffy without spreading at all, you may have added too much flour or your baking soda might be old and inactive.
Cookies that come out dry likely baked too long or at too low a temperature. Every oven runs differently, so getting to know yours matters. Use an oven thermometer to verify actual temperature versus what your dial says. Pull cookies when edges are golden but centers still look slightly underdone. They’ll firm up as they cool but stay moist inside.
Ingredient Substitutions
- Replace half the butter with shortening for extra-soft cookies that stay soft longer
- Use coconut sugar instead of brown sugar for subtle caramel notes
- Try bread flour instead of all-purpose for chewier texture
- Swap vanilla extract with almond extract for a different flavor profile
- Use dairy-free butter and chocolate for lactose-free cookies
- Replace one egg with a flax egg for egg-free baking
Storage and Serving
Store cooled cookies in an airtight container at room temperature for up to five days. Place a slice of bread in the container to keep cookies soft—the cookies absorb moisture from the bread. For longer storage, freeze baked cookies in freezer bags for up to three months. Let them thaw at room temperature for about thirty minutes before eating, or warm briefly in a low oven for that fresh-baked taste.
You can also freeze cookie dough balls on a baking sheet until solid, then transfer to freezer bags. Bake frozen dough balls directly from the freezer, adding an extra minute or two to the baking time. This way you always have fresh cookies ready whenever the craving hits. Just portion the dough, freeze, and bake as needed without thawing.
Frequently Asked Questions
Why are my cookies flat and greasy?
This usually happens when butter is too warm or melted. Make sure your butter is softened but still cool, and always chill dough before baking. Also check that you’re measuring flour correctly—too little flour causes spreading.
Can I make these cookies without chilling the dough?
While technically possible, skipping the chill results in flatter cookies with less developed flavor. Chilling firms up the fat, prevents excessive spreading, and allows flour to fully hydrate for better texture. Even 30 minutes makes a difference.
How do I get those bakery-style thick cookies?
Use chilled dough, scoop generous portions without flattening them, and pull cookies from the oven when centers still look slightly underdone. The carryover cooking finishes them while maintaining thickness.
What’s the best chocolate to use?
A combination works beautifully—semi-sweet chips for classic flavor plus hand-chopped dark chocolate for depth and irregular melty pockets. Quality matters more than type. Avoid cheap chocolate chips that taste waxy.
How long do these cookies stay fresh?
Stored in an airtight container at room temperature, they stay fresh for 4-5 days. Add a slice of bread to the container to maintain softness. Frozen cookies last up to 3 months.
Can I double this recipe?
Absolutely. The recipe doubles perfectly. Just make sure you have enough space in your fridge to chill all the dough, and bake in batches if your oven can’t accommodate multiple sheets at once.
Why did my cookies turn out cakey instead of chewy?
Too much flour or too much leavening causes cakiness. Make sure you’re measuring flour correctly by spooning it into measuring cups rather than scooping. Also verify your baking soda is measured accurately too much creates puffy, cake-like cookies.
Bakery Style Chocolate Chip Cookies
Ingredients
Equipment
Method
- In a large bowl, cream together softened butter, granulated sugar, and brown sugar using an electric mixer on medium speed for 2-3 minutes until light and fluffy.
- Beat in eggs one at a time, mixing well after each addition. Stir in vanilla extract until fully combined.
- In a separate bowl, whisk together flour, baking soda, and salt until evenly distributed.
- Gradually add dry ingredients to wet ingredients, mixing on low speed until just combined. Do not overmix.
- Fold in chocolate chips with a spatula until evenly distributed throughout the dough.
- Cover bowl with plastic wrap and refrigerate dough for at least 2 hours or up to 24 hours.
- Preheat oven to 375°F (190°C). Line baking sheets with parchment paper.
- Scoop dough into 2-tablespoon portions and place on prepared baking sheets, spacing them 2 inches apart. Do not flatten.
- Bake for 9-12 minutes until edges are golden brown but centers still look slightly soft.
- Let cookies cool on baking sheet for 5 minutes, then transfer to a wire rack to cool completely.